
Drawing a mouse may seem like a daunting task, but with the right techniques and a bit of practice, anyone can create a realistic and adorable rodent illustration.
In this comprehensive tutorial, we’ll walk you through the process of sketching, refining, and adding the final touches to your mouse drawing.
Whether you’re a beginner or an experienced artist, this guide will help you improve your skills and create a lifelike mouse that you can be proud of.
Drawing the Basic Shapes
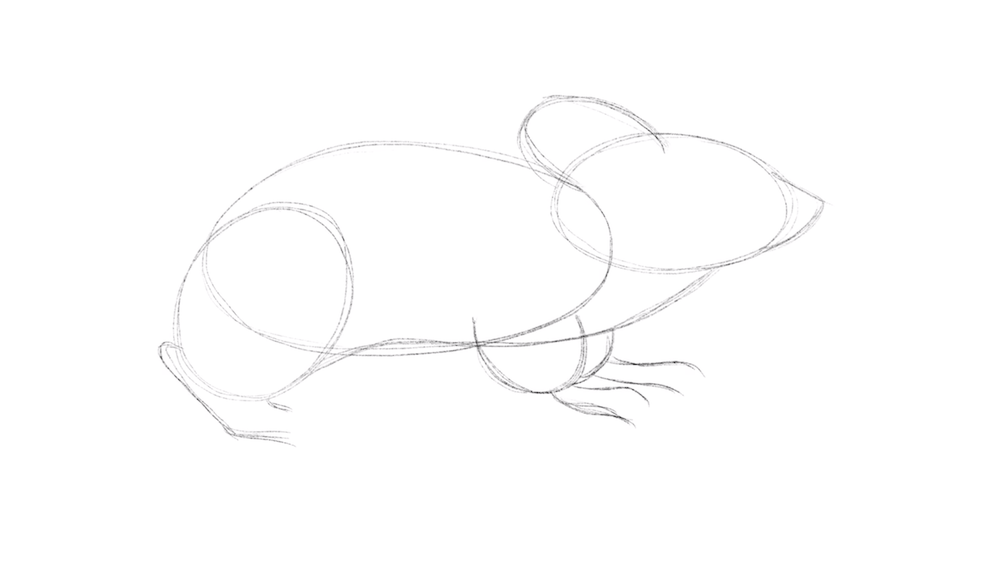
Step 1: Sketching the Main Body Shape
Begin by lightly sketching a simple oval shape for the mouse’s body. This will serve as the foundation for your drawing. Keep your lines loose and avoid pressing too hard on your pencil, as you’ll be erasing and refining these lines later.
Step 2: Adding the Head and Snout
Next, draw a smaller circle overlapping the front of the body oval for the mouse’s head. Then, add a small, triangular shape for the snout, connecting it to the head circle.
Step 3: Drawing the Ears
Sketch two small, circular shapes on top of the head for the ears. Position them slightly towards the back of the head, leaving room for the face details you’ll add later.
Step 4: Sketching the Legs and Feet
Draw four small ovals, two on each side of the body, for the mouse’s legs. Add small, rounded shapes at the end of each leg for the feet. Keep these shapes simple for now; you’ll refine them in the next stage.
Refining the Mouse Drawing
Now that you have the basic shapes in place, it’s time to refine your drawing and add more details.
Adding Details to the Face (Eyes, Nose, Whiskers)
Draw two small, beady eyes on the head, positioned slightly above the snout. Add a tiny nose at the tip of the snout and sketch several whiskers extending from the cheeks.
Creating the Fur Texture
To create a realistic fur texture, use short, quick strokes to draw small lines all over the mouse’s body, head, and ears. Vary the length and direction of the lines to mimic the natural flow of fur.
Drawing the Tail
Sketch a long, thin, curved line extending from the back of the body for the tail. Add fur texture to the tail using the same short, quick strokes you used for the body.
Refining the Legs and Feet
Erase the initial leg and foot shapes, and redraw them with more detail. Add small claws to the feet and refine the leg shapes to make them look more anatomically correct.
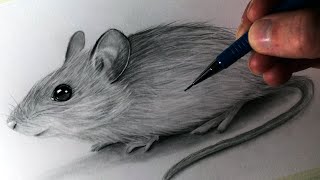
Shading and Coloring Your Mouse Drawing

Shading Techniques For Adding Depth and Dimension
To add depth and dimension to your mouse drawing, use shading techniques like hatching, cross-hatching, or blending. Concentrate the shading in areas where shadows would naturally fall, such as under the chin, belly, and legs.
Coloring Options (Realistic, Cartoon-Style, Etc.)
When coloring your mouse, you can choose a realistic color scheme (shades of gray, brown, or white) or opt for a more cartoon-style palette with vibrant colors. Consider your personal style and the overall look you want to achieve.
Tips For Blending and Shading With Colored Pencils or Markers
If using colored pencils, build up layers of color gradually and blend them using a colorless blender or a light touch. For markers, start with the lightest colors and work your way up to darker shades, layering colors to create depth and texture.
Final Touches and Variations
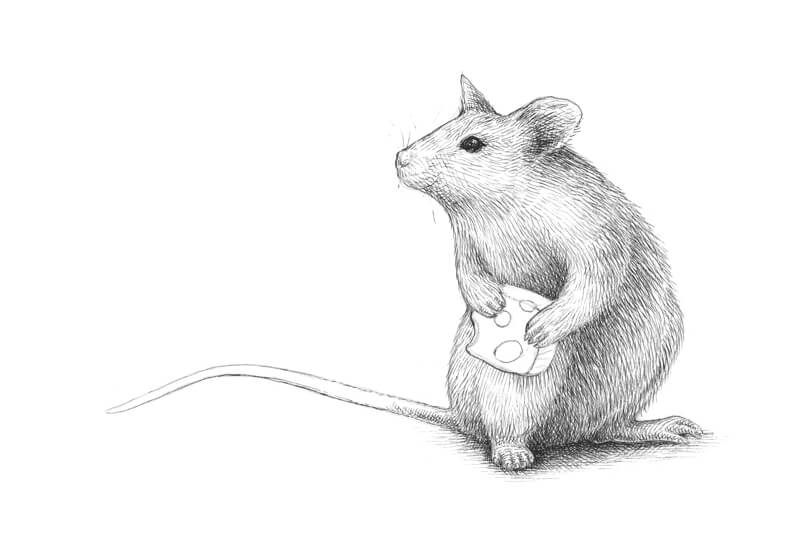
Adding Background Elements or Props
To give your mouse drawing more context, consider adding background elements or props like a piece of cheese, a small plant, or a mouse hole.
Experimenting With Different Mouse Poses or Expressions
Try drawing your mouse in different poses or with various facial expressions to add personality and interest to your illustration. For example, you could sketch a mouse reaching for a treat or curiously peeking around a corner.
Creating a Cartoon or Stylized Mouse Drawing
If you prefer a more stylized look, simplify the shapes and exaggerate features like the eyes, ears, or tail. Experiment with different styles until you find one that suits your preferences.
FAQ’s:
What Pencils Are Best For Sketching a Mouse?
HB or 2B pencils are ideal for initial sketches, as they provide a good balance of line control and erasability. For darker, more defined lines, use a 4B or 6B pencil.
How Can I Make My Mouse Drawing Look More Realistic?
Pay attention to details like fur texture, shading, and proportions. Use reference photos to help guide your drawing and ensure anatomical accuracy.
What Are Some Common Mistakes to Avoid When Drawing a Mouse?
Common mistakes include making the ears too large, the snout too long, or the legs too thin. Keep proportions in mind and refer to your reference photos often.
Can I Use This Tutorial to Draw Other Small Rodents Like Rats or Hamsters?
Yes, the basic principles and techniques covered in this tutorial can be applied to drawing other small rodents. However, be sure to study the specific anatomical features of the animal you want to draw.
How Long Does it Usually Take to Complete a Detailed Mouse Drawing?
The time required to complete a detailed mouse drawing varies depending on your skill level and the complexity of the illustration. Set aside at least an hour or two to work on your drawing, and remember that patience and practice are key.
Conclusion
Drawing a realistic mouse is a fun and rewarding project for artists of all skill levels.
By breaking down the process into simple steps and focusing on the key elements like shape, texture, and shading, you can create a lifelike and adorable rodent illustration.
Remember to practice regularly, experiment with different styles and techniques, and most importantly, have fun!
With time and dedication, you’ll be creating stunning mouse drawings in no time.
Leave a Reply