
Mushrooms are fascinating subjects to draw, with their unique shapes, textures, and details.
Whether you’re a beginner looking to learn the basics or an experienced artist seeking to refine your skills, this guide will walk you through the process of drawing mushrooms.
We’ll cover everything from sketching the basic shape to adding realistic details and shading. So grab your pencils and let’s get started!
Drawing a Basic Mushroom Shape
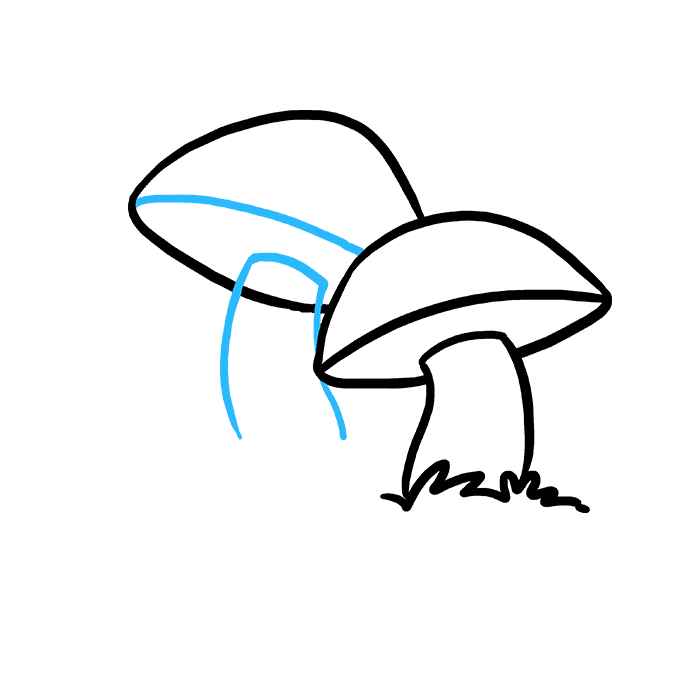
Step 1: Sketch the Mushroom Cap
Begin by lightly sketching a simple curved line for the top of the mushroom cap. This will serve as a guide for the overall shape. Don’t press too hard with your pencil, as you may need to erase and adjust the line as you go.
Step 2: Add the Stem
Next, draw two vertical lines extending down from the ends of the curved cap line to create the stem of the mushroom. The stem should be slightly narrower than the width of the cap. Make sure the stem lines are parallel to each other.
Step 3: Draw the Underside of the Cap
To complete the basic mushroom shape, draw another curved line connecting the bottom of the cap to the stem. This line should mirror the curve of the top of the cap, creating a sort of umbrella shape.
Tips For Getting the Proportions Right
- Use light, sketchy lines at first so you can easily erase and adjust as needed.
- Look at reference photos of mushrooms to get a sense of the proportions between the cap and stem.
- Don’t worry about making it perfect – mushrooms come in all sorts of shapes and sizes!
Adding Details to Your Mushroom Drawing
Now that you have the basic shape down, it’s time to start adding some details to make your mushroom drawing more realistic and interesting.
Creating Spots or Scales on the Cap
Many mushroom species have spots, scales, or other patterns on their caps. To add these, lightly sketch small circles, ovals, or irregular shapes across the surface of the cap. Vary the sizes and placement for a more natural look.
Drawing Gills Underneath the Cap
Mushroom gills are the thin, papery structures underneath the cap that produce spores. To draw them, lightly sketch thin, radiating lines from the stem to the edge of the cap. The lines should be close together and follow the curve of the cap’s underside.
Adding a Ring Around the Stem
Some mushrooms have a ring or skirt around the stem, which is a remnant of the veil that covered the gills when the mushroom was immature. To draw this, sketch a thin, horizontal line around the stem, usually near the top, and add some shading underneath to give it dimension.
Creating Texture on the Stem
Mushroom stems often have a slightly rough or fibrous texture. To simulate this in your drawing, use short, sketchy strokes that follow the direction of the stem. Vary the pressure and overlap the strokes to create a more organic look.
How to Draw a Realistic Mushroom?
If you want to take your mushroom drawing to the next level, it’s important to observe real mushrooms closely and understand their anatomy and details.
Observing Mushroom Anatomy and Details
Take some time to study photos or real specimens of the mushroom species you want to draw. Notice the way the cap curves and attaches to the stem, the pattern and texture of the gills, and any unique features like scales, spots, or a ring around the stem.
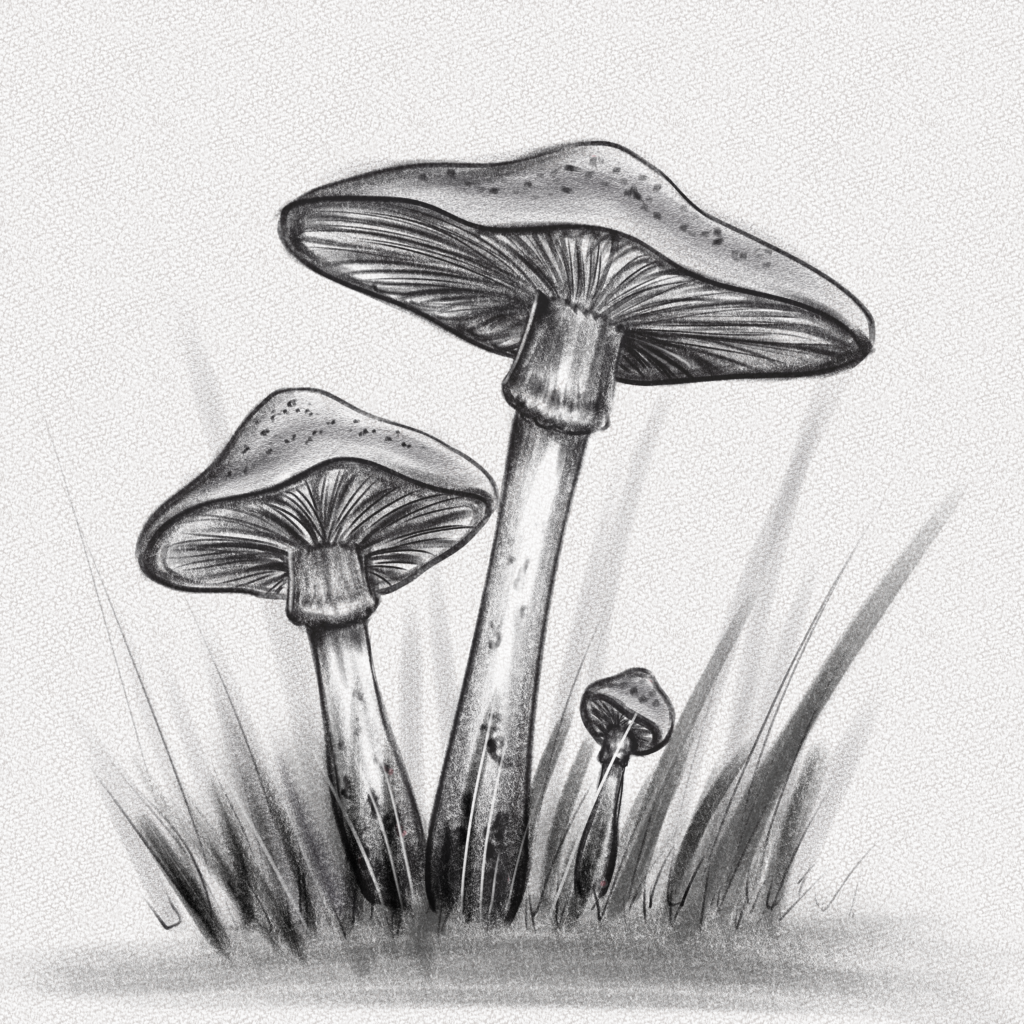
Using Shading to Create Form and Depth
Shading is key to making your mushroom drawing look three-dimensional and realistic. Use a softer pencil (like a 2B or 4B) to add darker tones to the underside of the cap, the gills, and any areas that would be in shadow. Use a kneaded eraser to lift highlights on the top of the cap and stem.
Rendering Different Textures Realistically
Pay attention to the different textures on the mushroom and try to recreate them in your drawing. Use a combination of short strokes, dots, and smudging to simulate the velvety or slightly rough texture of the cap. For the gills, use thin, parallel lines and vary the darkness to create depth.
Examples of Realistic Mushroom Drawings
Looking at examples of realistic mushroom drawings can help you understand shading, texture, and detail techniques. Some great artists to check out include Alison Pollack, Katie Scott, and Noel Badges Pugh. Study their work and try to identify the techniques they use to make their mushrooms look so lifelike.
Drawing Mushrooms With Pencil
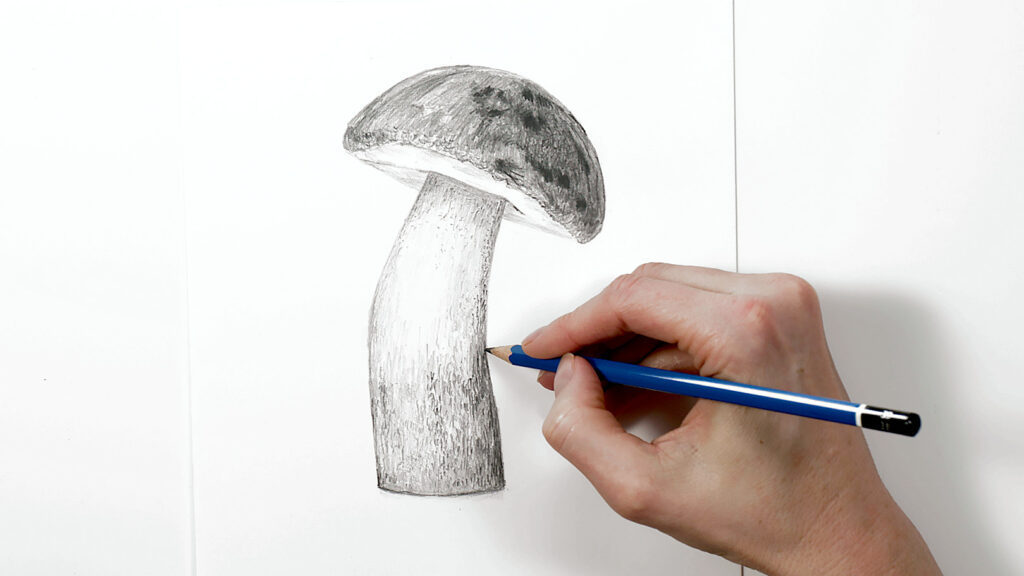
Pencil is a great medium for drawing mushrooms, as it allows you to create a wide range of tones and textures. Here are some tips for using pencil effectively:
Pencil Techniques For Sketching and Shading
- Use a light touch and sketchy lines when blocking in the basic shape of the mushroom. This allows you to easily erase and adjust as needed.
- For shading, use a combination of hatching (parallel lines), cross-hatching (intersecting lines), and stippling (dots) to build up tones gradually.
- Vary the pressure you apply to create lighter and darker tones. Press harder for darker areas and use a lighter touch for highlights.
Building Up Tones Gradually
Don’t try to achieve the darkest tones right away. Instead, start with a light layer of shading and gradually build up to darker tones by adding more layers. This allows you to better control the value range and create smoother transitions.
Blending and Creating Smooth Transitions
To create smooth transitions between tones, use a blending stump or your finger to gently smudge the pencil strokes. Be careful not to overblend, as this can flatten the texture and make the drawing look muddy.
Recommended Pencils For Drawing Mushrooms
For sketching and light shading, use a harder pencil like an HB or 2H. For darker tones and details, switch to a softer pencil like a 2B or 4B. Having a range of pencil grades will allow you to create a variety of tones and textures.
Mushroom Drawing Ideas and Inspiration
Once you’ve mastered the basics of drawing mushrooms, you can start exploring different ideas and compositions to make your artwork more interesting and unique.
Mushroom Species To Draw
There are countless species of mushrooms, each with its own distinct shape, color, and texture. Some interesting ones to try drawing include:
- Fly Agaric (Amanita muscaria) – the classic red-and-white spotted toadstool
- Chanterelles – funnel-shaped mushrooms with ridged, gill-like folds
- Inky Caps (Coprinus) – tall, slender mushrooms that dissolve into an inky black liquid as they mature
- Turkey Tail (Trametes versicolor) – a colorful, fan-shaped bracket fungus with concentric zones of color
Composition Ideas With Mushrooms
- Draw a cluster of mushrooms growing together in a fairy ring
- Show mushrooms at different stages of growth, from tiny buttons to fully mature specimens
- Create a still life composition with mushrooms and other natural objects like leaves, acorns, or feathers
- Draw a cross-section view of a mushroom to showcase its internal structure
Drawing Mushrooms in Natural Settings
Mushrooms don’t exist in isolation – they’re part of complex ecosystems and habitats. Try drawing mushrooms in their natural surroundings, like:
- Growing on a decaying log or stump in a forest
- Poking up through leaf litter on the forest floor
- Clustered at the base of a tree or stump
- Sprouting from a grassy field or lawn
Mushroom Drawing Prompts and Challenges
If you’re feeling stuck or uninspired, try some of these drawing prompts and challenges to get your creativity flowing:
- Draw a mushroom from an unusual angle, like looking up from below or down from above
- Create a whimsical or surreal mushroom drawing, like a mushroom house or a mushroom creature
- Challenge yourself to draw 100 different mushrooms in 100 days
- Participate in Inktober or another drawing challenge and include mushrooms into your prompts
FAQ’s:
What Are Some Common Mistakes When Drawing Mushrooms?
Some common mistakes include making the stem too thick or too thin in proportion to the cap, forgetting to add gills or other details underneath the cap, and not using enough contrast in shading to create a sense of form and depth.
How Can I Make My Mushroom Drawings Look More Three-Dimensional?
Use shading to create a sense of light and shadow. Imagine a light source coming from one direction and add darker tones to the areas that would be in shadow, like the underside of the cap and the side of the stem away from the light. Use highlights to show where the light hits directly.
What Pencils Do You Recommend For Realistic Mushroom Drawings?
A set of graphite pencils ranging from hard (H) to soft (B) is ideal for creating a range of tones and textures. A good starter set would include 2H, HB, 2B, 4B, and 6B pencils.
Can You Suggest Some Reference Photos For Drawing Mushrooms?
Websites like Mushroom Observer, iNaturalist, and Flickr have extensive collections of mushroom photos submitted by users. You can also find good reference photos in field guides or by doing a Google image search for the specific mushroom species you want to draw.
How Long Does it Usually Take to Draw a Detailed Mushroom?
It depends on the level of detail and realism you’re aiming for, as well as your own drawing speed and experience level. A simple mushroom sketch might take 15-20 minutes, while a more detailed, realistic drawing could take several hours or even multiple sessions to complete.
Conclusion
Drawing mushrooms is a wonderful way to appreciate the beauty and diversity of these fascinating organisms.
By starting with a basic shape and gradually adding details and shading, you can create realistic and expressive mushroom drawings that capture their unique character.
Remember to observe real mushrooms closely, experiment with different techniques and compositions, and most importantly, have fun and keep practicing.
With time and patience, you’ll be able to create mushroom drawings that are truly magical.
Leave a Reply