
Ever found yourself frustrated when trying to paint eyes that end up looking like they’re staring off in different directions, rather than at you? You’re not alone. But fear not!
This guide is here to rescue you from the woes of creating cross-eyed characters and instead equip you with the skills to paint eyes like a seasoned pro.
So, if you’re ready to banish those wonky gazes and impress your family with your artistic prowess, keep reading for some practical and beginner-friendly tips on mastering the art of painting eyes.
How To Paint Eyes With Best Techniques?
To paint eyes using the best techniques, you have a lot of options depending on what you’re comfortable with.
One cool technique is called alla prima, which is Italian for “at first attempt.”
This means you paint the whole eye in one go, without waiting for layers to dry. It’s like painting everything in one sitting, pretty fast.
You can use this technique with acrylic or oil paints. It’s all about doing it quickly and confidently. Give it a try and see how it works for you!
Oil Painting
To paint eyes with the best techniques, especially in oil painting, follow these steps:
- Prepare the Canvas: Start by applying a thin wash over the entire canvas to eliminate the stark white background. You can achieve this by using a very thin, drippy layer of any light color mixed with paint thinner.
- Outline the Eye: Use a small brush with a pointed tip to sketch the outer contour of the eye. Create a straight line slightly tilted from the tear duct, then a soft curved line connecting to the back corner of the eye. The bottom line should be softer, swooping under the eye and connecting again to the tear duct and back corner.
- Sketch the Details: Sketch in the iris and the crease above the top eyelid once the outer contour is done. This helps establish the basic structure of the eye.
- Block in Dark Areas: Use a medium-sized brush to block in the darkest areas of the eye, such as the pupil, creases, and under the eyelid. These areas should have a value between 6-10.
- Build up Midtones and Highlights: Continue painting by gradually blocking in midtones and highlights. Use varying values to create depth and dimension in the eye.
- Use Mediums for Fluidity: Maintain the fluidity of the paint by mixing a medium like linseed oil or galkyd into it. This helps the paint flow smoothly on the canvas.
- Painting the Whites of the Eyes: Avoid using straight white paint for the whites of the eyes. Instead, tint the whites based on the lighting situation. For example, mix paynes gray or brown pink for a realistic effect. Remember, the whites of the eyes can have a blue/gray or red tint, depending on the lighting conditions.
- Add Color Variation: Make the whites of the eyes slightly more colorful along the edges and corners, with a brighter white near the iris.
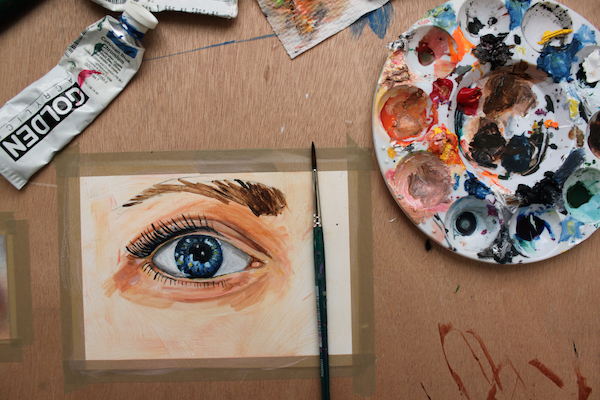
Acrylic Painting
When it comes to painting eyes using acrylics, you’re in luck because acrylic paints dry quickly, making the process easier compared to using oils.
Here’s how you can paint eyes using acrylics:
- Prepare Your Materials: Gather your acrylic paints, brushes, palette, and water. Unlike oils, you’ll use water to thin your paints instead of paint thinner.
- Palette Setup: Have a variety of colors on your palette. This includes skin tones, whites, blacks, and any other colors you might need for detailing.
- Alla Prima Technique: This technique involves completing the painting in one session. With acrylics, it’s easier because they dry fast. You won’t need to wait long between layers.
- Brush Selection: Use different brushes for different aspects of the eye. A fine-tipped brush is excellent for detail work, while a broader brush can help with larger areas.
- Glazing for Depth: After finishing the base layers with acrylics, you can enhance depth and richness by glazing with transparent oil colors. Mix the oil paint with a medium to keep it fluid. Apply this transparent layer over the acrylics to add depth and saturation to your painting.
- Practice and Patience: Painting eyes can be challenging, so practice regularly and be patient with yourself. Don’t be afraid to make mistakes; they’re part of the learning process.
Methods To Paint Eyes
If eyes are a gateway to the soul, should they be easy to create? Painting eyes takes time and preparation, like most subjects to be painted.
You can create a realistic eye if you have the time for it. In modern art, most eyes represented are not realistic. Create the eyes you want to see and use your own artistic style.
To paint eyes effectively, you can follow these steps:
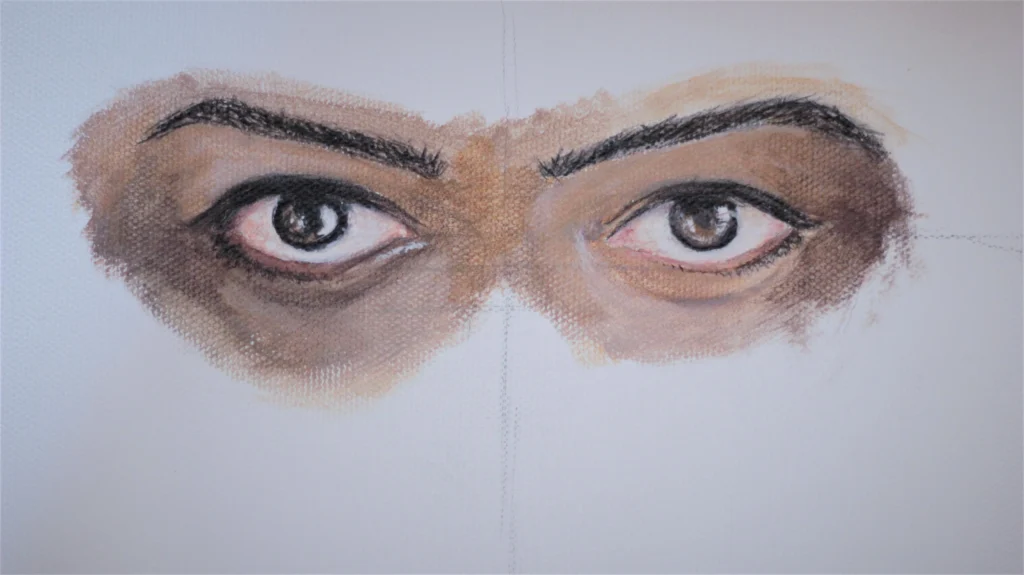
- Drawing Eyes for Practice: Begin by honing your drawing skills. Drawing helps you understand the basic structure and design of eyes before you start painting. While drawing and painting are different, mastering drawing fundamentals is crucial.
- Observation: Take time to observe eyes in real life or through images. You can find plenty of eye images online for inspiration. Additionally, having a mirror nearby can provide you with a great reference – your own eyes.
- Doodling: Experiment with doodling eyes. Don’t worry about making perfect drawings at this stage. The aim is to explore different styles and shapes freely. Doodling allows you to find your unique artistic voice.
- Review and Selection: Look back at your doodles and identify the eye you’re most satisfied with, not necessarily the most realistic one. This will be the basis for your further work.
- Redraw: Take the chosen eye and redraw it with more attention to detail. Spend more time refining its shape and features. Fill up a page in your sketchbook with this redrawn eye.
- Detailed Drawing: Once you’ve refined the basic shape, focus on adding more intricate details. Study real eyes for inspiration and incorporate those details into your drawing. This step helps you understand the complexity of eyes.
- Simplified Drawing: Create a simplified version of the detailed eye. This simplified drawing will serve as the outline for your painting. Transfer this outline onto your canvas or chosen surface.
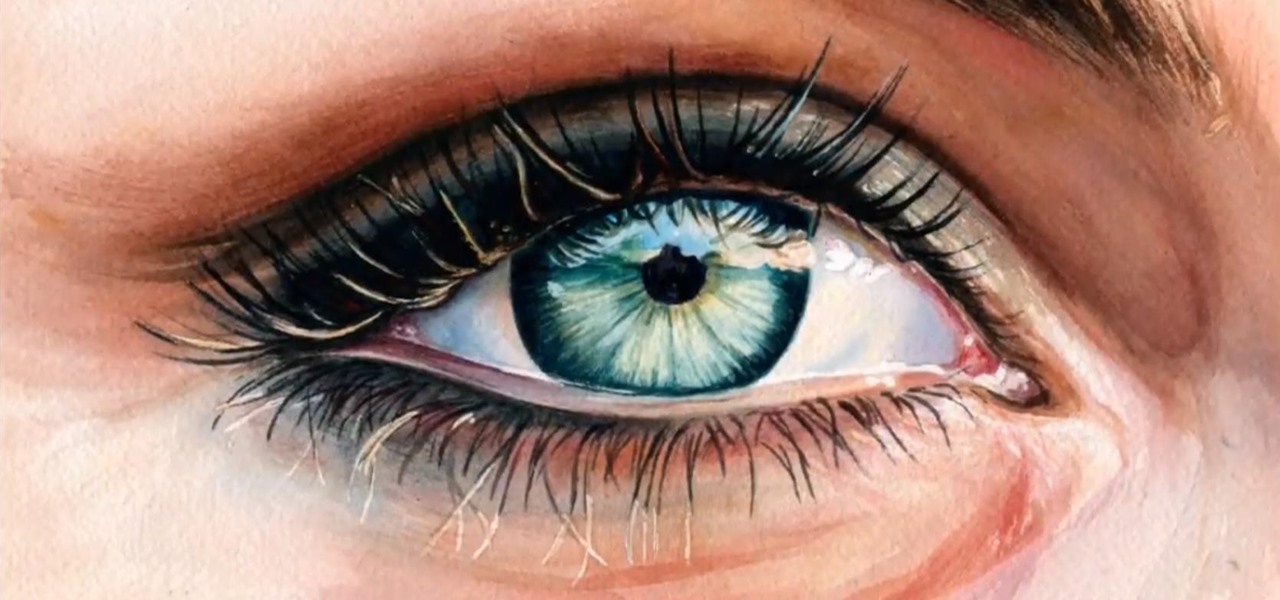
How to Add the Iris and Reflection Area?
Adding the iris and reflection area to a painting of an eye requires attention to detail and a careful approach.
Here’s a step-by-step guide:
- Choose the Right Brush: Select a small brush suitable for tiny details like the iris, sparkle, and reflections. A size 4 filbert brush works well for creating inner streaks of color.
- Layering Technique: Start by painting the iris with the darkest color visible in the eye. Apply this initial layer evenly across the iris.
- Building Depth: Work in layers, gradually adding lighter and more colorful streaks to the iris. Use a small brush to create intricate details and build depth gradually from dark to light.
- Clean Brush for Bright Details: When adding small and bright details, ensure your brush is clean of any other paint colors. This helps maintain the purity of your bright colors and prevents unwanted mixing.
- Mixing Bright Colors: Mix your bright color for the highlights on the eye, ensuring the paint sits on top of the brush tip. Avoid pressing the paint into the brush, as this can lead to smudging when transferring the paint to the canvas.
- Applying Highlights: Lightly mix and scoop the mixed color onto the tip of the brush. Gently apply the bright highlights to the eye, letting the brush lightly kiss the canvas. This technique ensures that the bright color remains distinct from the darker layers underneath, creating a subtle sparkle effect without smudging or blending with the surrounding colors.
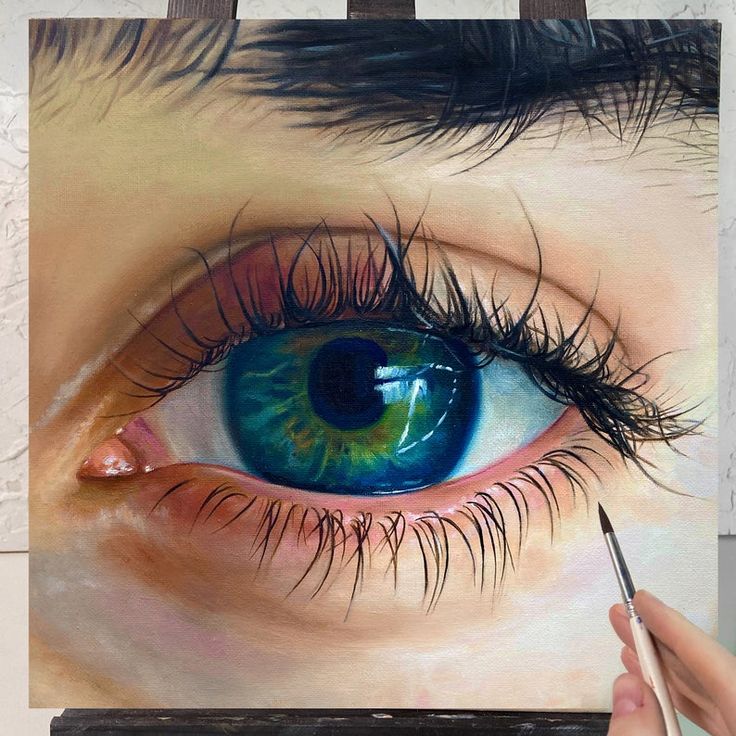
Adding Eyelashes
Adding eyelashes to a painting of an eye is like putting the cherry on top of an ice cream sundae – it’s the finishing touch that makes it perfect!
The brush you use is super important when painting eyelashes. I suggest getting a good quality script brush and keeping it clean. A messy brush can ruin the whole look!
When you’re painting the eyelashes, start from under the eyelid. Make a swooping motion from underneath and then up. If you just go straight up, it won’t look as realistic.
Once you’ve got those lashes on, you’re done! Your eye painting will look amazing.
By following these steps and understanding what makes a painting look good, you can learn to paint realistic eyes and anything else you dream of.
Conclusion
Embarking on the journey of painting eyes unveils a realm where each stroke carries the potential to convey emotion and depth.
From mastering techniques like alla prima in oils to harnessing the quick-drying nature of acrylics, there’s a method suited to every artist’s style.
By honing drawing skills, observing keenly, and exploring creativity through doodling, artists lay the groundwork for infusing their work with unique perspectives. It’s not merely about replication but about imbuing each piece with personal flair.
Armed with knowledge of layering, capturing iris sparkle, and delicately adorning with eyelashes, artists can confidently translate visions onto canvas.
With each stroke, they inch closer to mastery, crafting captivating expressions that resonate deeply.
In the limitless expanse of art, there’s boundless potential waiting to be explored – may the journey through painting eyes be as enriching as it is rewarding.
Leave a Reply